How to remove a blockage from your machine
Removing blockages from the Direct-drive cleaner head
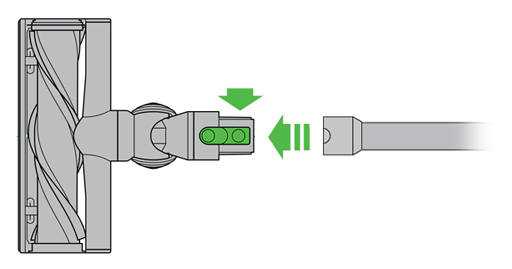
Step 1 - Removing the Direct-drive cleaner head from the wand
- Disconnect the cleaner head from the wand by pressing the release button.
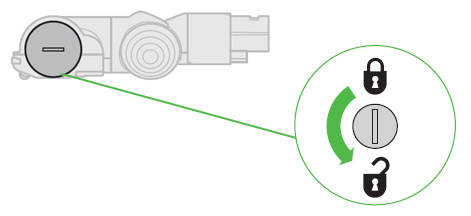
Step 2 - Unlocking the brushbar end cap
NB: Beware of sharp objects when checking for blockages.
- If you cannot clear an obstruction you may need to remove the brushbar.
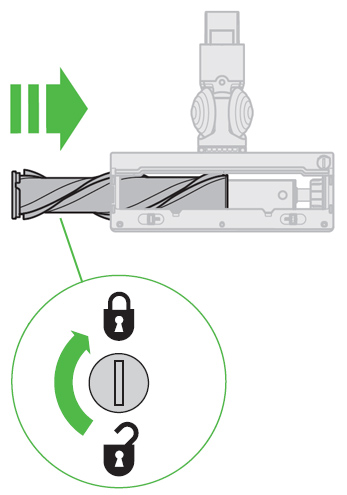
- Use a coin to unlock the fastener marked with a padlock.
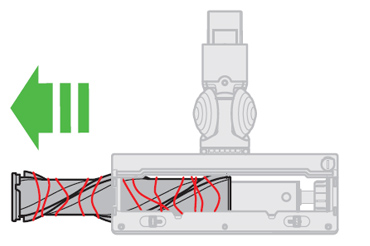
Step 3 - Removing the brushbar
NB: This product has carbon fibre brushes. Take care if coming into contact with them, as they may cause minor skin irritation. Wash your hands after handling the brushes.
- Gently slide the brushbar away from the cleaner head.
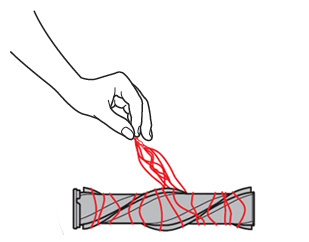
Step 4 - Clear any debris
- Carefully clear any debris from the brushbar.
Step 5 - Refitting the brushbar
- Slide the brushbar back onto the cleaner head, around the motor. The end cap should be in the open position as shown.
- Once in place, rotate the end cap back into the closed position.
- Close the fastener by turning a quarter turn clockwise. Ensure that the fastener is fully turned and the brushbar is secure.
- Re-fit the cleaner head and test the machine.
 Back to top
Removing blockages from the Soft roller cleaner head
Step 1 - Removing the cleaner head from the wand
- Disconnect the cleaner head from the wand by pressing the release button.
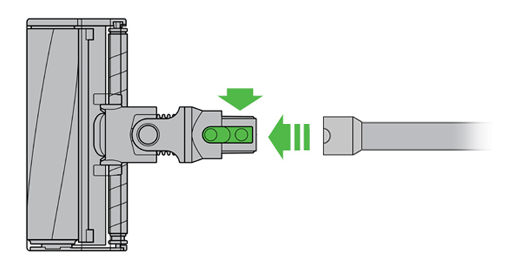
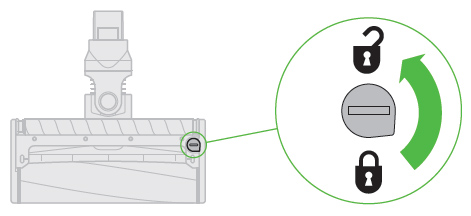
Step 2 - Unlocking the brushbar end cap
NB: Beware of sharp objects when checking for blockages.
- If you cannot clear an obstruction you may need to remove the brushbar.
- Turn the cleaner head upside down so the underside of the cleaner head is facing you.
- Use a coin to unlock the fastener marked with a padlock.
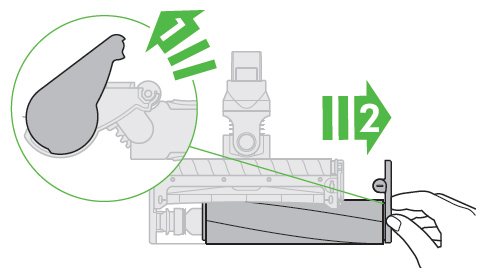
Step 3 - Removing the brushbar
NB: This product has carbon fibre brushes. Take care if coming into contact with them, as they may cause minor skin irritation. Wash your hands after handling the brushes.
- Rotate the end cap to the open position.
- Gently slide the large brushbar away from the cleaner head.
- Remove the end cap from the brushbar.
Step 4 - Clear any debris
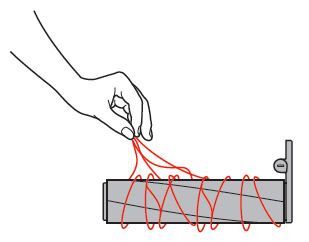
- Carefully clear any debris from the brushbar.
Step 5 - Refitting the brushbar
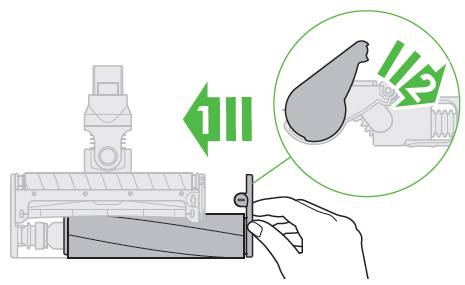
- Slide the large brushbar back onto the cleaner head, around the motor.
- The end cap should be in the open position as shown.
- Once in place, rotate the end cap back into the closed position.
Step 6 - Locking the brushbar end cap
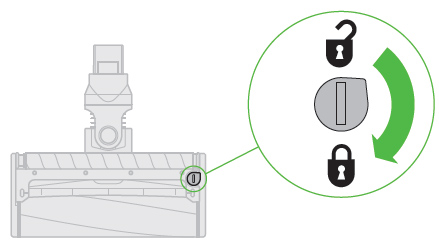
- Close the fastener by turning a quarter turn clockwise. Ensure that the fastener is fully turned and the base plate and the brushbar is secure.
- Re-fit the cleaner head and test the machine.
Back to top
Removing blockages from the Mini motorised head
Step 1 - Unlocking the brushbar endcap
- Beware of sharp objects when checking for blockages.
- If you cannot clear an obstruction you may need to remove the brushbar.
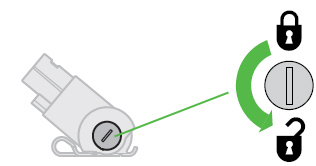
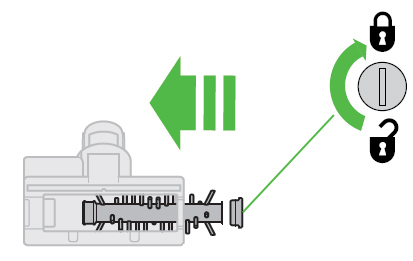
- Use a coin to unlock the fastener marked with a padlock.
Step 2 - Removing the brushbar
- Carefully remove the brushbar and clear any debris.
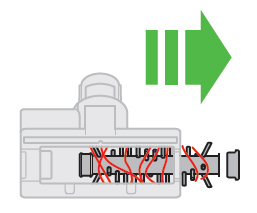
Step 3 - Refitting the brushbar
- Replace the brushbar and secure it by tightening the fastener.
- Ensure it is fixed firmly before operating the machine.
- Re-fit the Mini motorised head and test the machine.
Back to top
Removing blockages from the inlet pipe and cone shroud
Step 1 - Removing the clear bin from the cyclone
To release the clear bin from the cyclone:
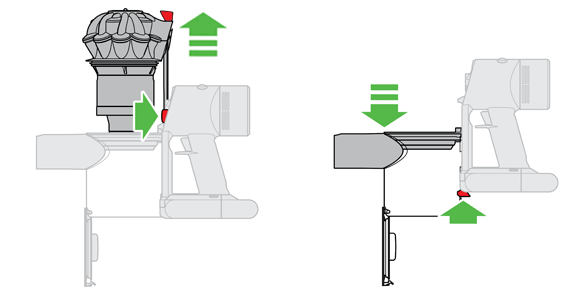
- Hold the machine by the handle, pull the red lever back and lift upwards to release the cyclone. Continue until the bin base opens fully.
- Press the red bin release catch located to the rear of the clear bin assembly.
- Remove the clear bin carefully.
Step 2 - Cleaning the clear bin
- Clean the clear bin with a damp cloth only.
- Do not use detergents, polishes or air fresheners to clean the clear bin.
- Do not put the clear bin in a dishwasher.
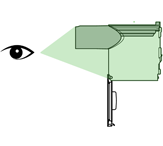
Step 3 - Cleaning the cyclone shroud
- Clean the cyclone shroud with the brush on the combination tool to remove lint and dust.
- Do not immerse the whole cyclone unit in water or pour water into the cyclones.
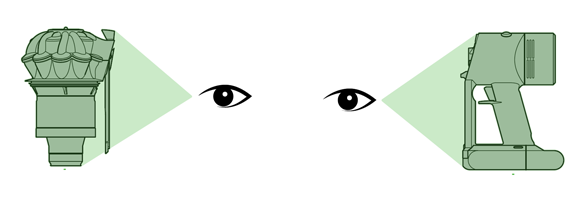
Step 4 - Refit the clear bin
- Ensure the clear bin is completely dry before replacing.
- To replace the clear bin, push the clear bin up and in to the main body of the machine. It will click into place.
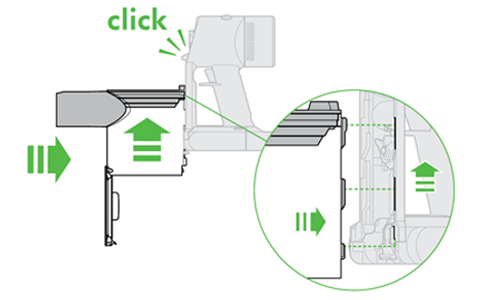
Step 5 - Refit the cyclone
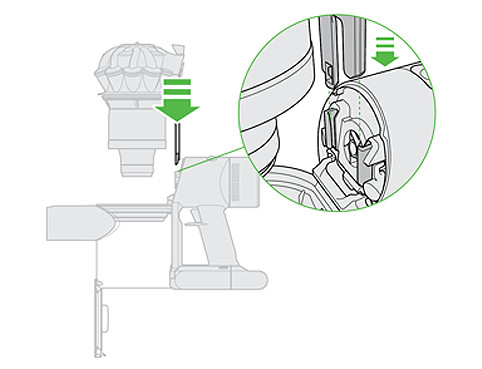
- Locate the runners on the cyclone into the slots on the main body.
- Slide the cyclone down fully, until it clicks in place.
Step 6 - Close the bin base
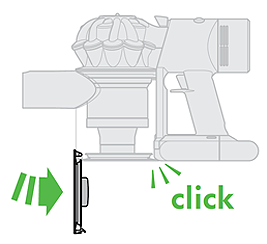
- Close the clear bin base so it clicks into place and is secure.
Back to top