Emptying the clear bin step by step
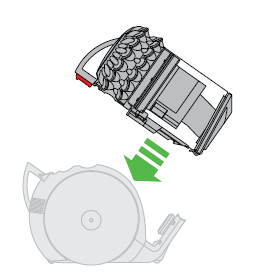
Step 1 - Remove the clear bin and cyclone
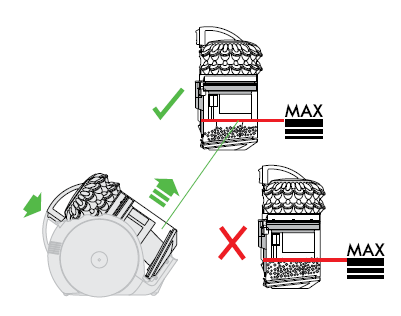
- Empty as soon as the dirt reaches the level of the MAX mark – do not overfill.
- Press red button to release cyclone and bin from the machine.
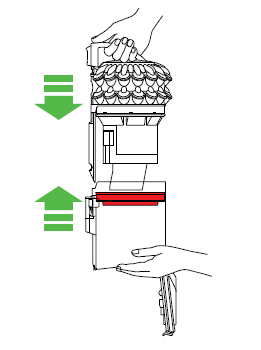
Step 2 - Opening the bin
- Push down on the red button to push the bin assembly down and clear the shroud.
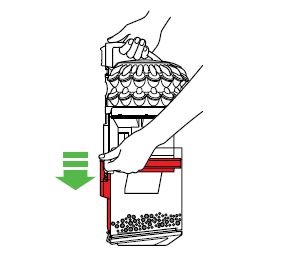
NB: The bin base will not open at this point.
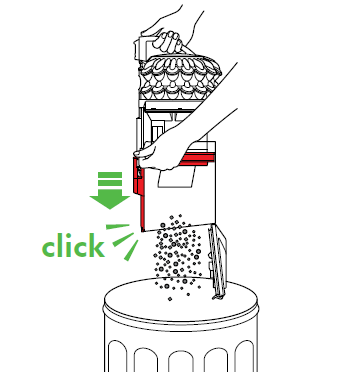
Step 3 - Emptying the bin
- The bin base will only open when the bin assembly is fully pushed down.
- Emptying carefully into a bag is recommended for allergy sufferers.
Do not wash the cyclone assembly or shroud.

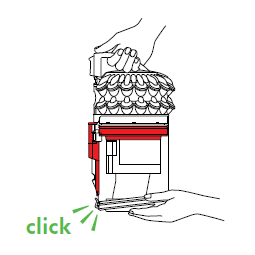
Step 4 - Refitting the clear bin
- Push the bin assembly up until it clicks into place.
- Do not close the bin base at this point.
Step 5 - Close the bin
- Close the bin base after the bin assembly has been clicked into place.
Step 6 - Reassemble the machine
- Place the bin and cyclone back into place on the machine.